Thursday, February 27

Paper Dresses

Did any of you catch this article? 
Four Year Old Makes Paper Dresses With Mom and They Get More and More Amazing
While paper dresses are not a new concept, this 4 yr old puts a new spin on it.  I found the article pretty inspiring from the standpoint that a Mother allowed and was involved in the creative process of her child.  I love that the girl wanted to create more and more challenging designs.  I hope that the process continues and we can continue to be inspired by simple ideas like making play clothes out of paper!

Wednesday, February 26

Remember to Play!

When I was at my friend's place this last Spring, (Oh to remember warmth and green!), she had a bag she was using from Teavana to carry miscellaneous stuff and it was a bute.  One thing about opening your mind to creating with all kinds of paper, is that you see envelopes and stationery everywhere.  I could use others' rubbish to create stationery and never need to buy more!!! Yea, right.  I just have a stationery habit I can't kick. 
Well the friend said she would send me the bag some time to tear up and that day came.  It was a snow day, which one, well we've had so many!  But I did remembered to take some pics to share.  So I decided to play and play I did.
 The beautiful outer raw paper and brick color of the bag.  The inside is a deep purple.
 I decided to make an envelope where I used paper straps to close it.  I cut holes and weaved the strips through and then taped them to the inside.
 I folded and glued the ends.
 Then I add a tag for the address.  When its ready to send I will fold over the straps and secure them to the back.  This will hold in a letter only, no smalls.
 For another I was inspired by a clutch purse.  I made a trifold and secured a strip around it that will meet and be glued under the square below.

 Lastly I made a postcard with strips of leftovers and security envelopes glued down. 
On the back, I decided to make a glassine envelope to put a letter in.  Due the postcards size, I will have to mail it as a letter anyway, so why not have fun!  I am sure the recipient will love this!  I know this because I know I would like this.
Now go forth with scissors and glue stick in hand and make something PLAYFUL!  You really cannot go wrong when you play because playing means a lack of plans, being spontaneous, and having fun.

What would you do if you knew you could not fail? 

-b

Monday, February 24

Accordion Card/ Book Project

Hello all!
I have recently been obsessed with making these accordion cards.  I started a few weeks ago after my friend lost her dog of 18years as a keepsake and since then I have played with the function. 
To start I recommend you should watch this little video that I found super helpful.

The only thing I do differently is I make 2 covers. Front and Back.
 I use a thin cardboard like what you would find in the back of a box.
 A tip on which type of paper to use, you may want to fold test a corner.  If it breaks like above, you may want a different paper.
 I worked in 4inch squares because the scrapbook paper comes in 12 by 12inches and cuts down into 3 strips that fold into three 4 by 4 sections.  I find 2 connected as seen above make a good size book.
 I like to use double sided scrapbooking paper for the center papers so you have 2 sides ready to use.
 This is the front side of the card and the front panel.

 This is the flip side and I attached a ribbon under the panel.

And this is a different book all bundled and ready to go!  They look like beautiful little presents! 
I could see these being mini scrapbooks, trade books for people to add and pass, keepsakes, or for fancy letters. 
Keep creating my friends!
-b

Saturday, February 22

New Design

I decided to shake things up a bit and create a new design.  I have yet to be so bold as to incorporate my own pictures in the header, but I liked the paper look this design brought.  The cheery yellow background looks like a paper I would want to create with! 
I tried to pick colors and fonts that would be easy to read, so let me know if you are having any difficulties with them!  I promise to get a project post up yet this weekend.  Until then, if you are in the Northeast or MidAtlantic regions of the USA, enjoy the mild temps and rays of sunshine.  Something we have all been lacking for too long!

Sunday, February 16

Bold Heart Design

I promised more on the theme of the bold heart design.  When I first started to flirt with the design, I thought it would be one that lends itself to a variety of projects.  Found out I was right!  I made postcards and envelopes and Valentines with similar designs and I never got tired of it.

 Do you remember the shard card I did awhile ago?  The above was a bit of a take on that. 
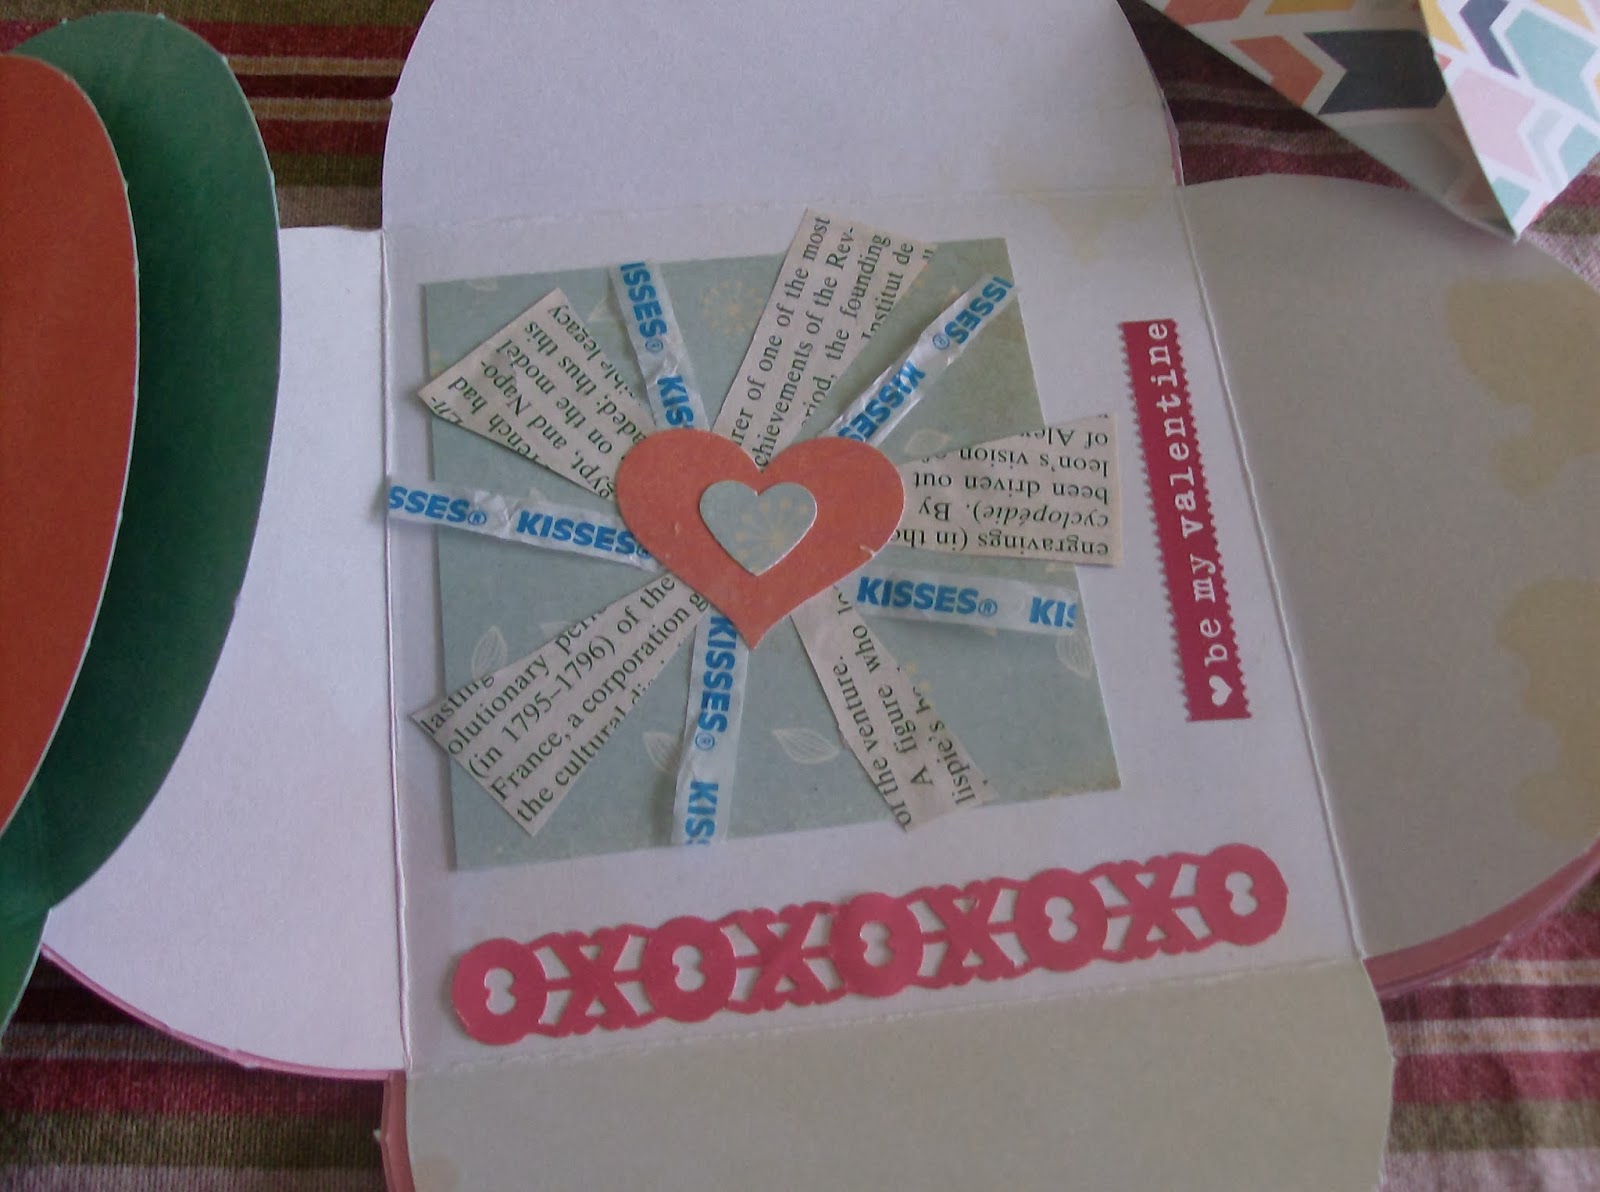
 These are the cards I ended up making for my friends out of a small set of petal envelopes.  I cut varying sizes and thicknesses of paper in isosceles and right angled triangles.  I usually used  because there is a rule of odds being more eye appealing than even numbers. 
 I sacrificed myself and ate some Hershey Kisses to make this one.  Always a recycler!
The fruits of my labors!  Although the snow storms keep me from mailing them on time.
I hope you had a great weekend!

-thesnailmailer

Friday, February 14

Cat VS Mail

I think we could all use a laugh.  I am working on a few projects one I hope to have up later this weekend. 


Until then, smile!
-Becky

Saturday, February 8

Snow Day - Recycling Projects

Hello all,
Most of you in the Midwest and Eastern USA are tired of this winter and its depressingly cold temperatures and heavy snowfalls.  This week I got to stay home from work due to a wintry mix of freezing rain and snow.  Yuck!
Do you see the branch bending in the center from snow and ice?

But it did give me an opportunity to experiment.  I saved some winter themed Christmas cards that I received to turn into postcards and envelopes.  I thought I would share the results of what started that day. 

 
 Winter only themes, nothing too Christmas related were chosen.  I then cut the backs off of them.  Most held little more than a signature, so I recycled the backs. 
I did not take a picture of the one envelope I did by trimming 2 of the cards to the same size and washi taping them together.  But that is an option!

 What I did that I thought turned out neat was cut random pieces of security envelope and fold edges and glue them down as shown above. 
 I liked the uneven angular edges and had an idea of being more spiky.  Although I was thinking to keep them functional so as to use as an envelope.
Here they are all folded down. 
The idea is when the recipient gets the card, they can unfold the layers. 
This particular Christmas/ Winter themed card is going to a pen pal that I am way, way over due on mailing, so I decided to make the interior a Valentine.  I love the big heart theme I created!  More on this design soon.

Finally if you do something different that needs to be open in a different fashion, please let the recipient know!  You spent time to make something different, and it should be appreciated for what it is, mail art.

Keep creating my friends!

 P.s. I am planning on getting a new camera as I realize all the images are below par.  Please bare with me till the research and shopping can get done.